|
DINNER
|
GREAT RECIPES & FOOD TIPS...
|
APPETIZERS & SIDES |
|||
|
Southern candied sweet potatoes, ham and pineapple ..
|
Had a few sweet potatoes that needed using up and a small amount of sliced ham I needed to stretch....
**** What I used: Ham (optional) 6 large sweet potatoes ½ cup butter (4 tablespoons) 1 cup white sugar 1 cup brown sugar 1 teaspoon ground cinnamon 1 teaspoon ground nutmeg salt to taste (I used 1 teaspoon) 1 tablespoon vanilla extract Pineapple chunks, drained (optional) Note: I only had crushed pineapple this time, but it worked! I like the chunks better but hey, you use what you have.. An be sure to use the vanilla, vanilla really makes a difference. |


Pic 1. I peeled and sliced up the sweet potatoes
Pic 2. I par cooked the sweet potatoes in the microwave, so it wouldn’t take as long to cook. This is optional.
Pic 3. Melt butter in a pan, added ham and sautéed a few min to brown ham a bit.
Pic 4. Add sweet potatoes and pineapple chucks (optional)
Mix sugar, cinnamon, nutmeg, and salt in a bowl, pour over potatoes and stir until well-combined. If you par cooked, stir gently so not to mush the sweet potatoes too much.
Cover the skillet, reduce heat to low, and cook, stirring occasionally, until potatoes are "candied" and tender if you didn’t par cook. The sauce will darken as it cooks. The time will depend on size and if you decided to par cook or not. If you didn’t par cook, they will take about an hour to cook the sweet potatoes.
Pic 5. When done cooking just before serving add the vanilla and mix in well. Serve!

|
Got some borscht in the crock pot. No recipe, I just threw stuff that I got from a farmer’s market in the pot with frozen pork chops.
Edited to add “recipe”: 5 beets chopped, 2 onions, 3 purple radishes, 4 carrots, 4 frozen pork chops, water to cover, and a 1/2 apple cider vinegar. Cook for 8 hours or so. I might add some shredded cabbage and dill later. |
PASTAPOTATOES |
RICEVEGGIESEXTRA |

|
A family favorite!
Make extra...they are addicting! Sausage balls Ingredients 1 pound sausage (room temperature)(I use Owens or Jimmy Dean Hot sausage) 4 cups shredded Cheddar cheese (room temperature) 3 cups bisquick Directions Preheat oven to 400 degrees F (200 degrees C). In a medium bowl, combine the sausage, cheese, and dry baking mix. Mix together, (you can do this by hand, I use a hand mixer and it’s so much easier) and shape mixture into ping pong-sized balls. Place on a foil-lined or parchment paper cookie sheet. DO NOT USE WAX PAPER, it will stick to it! Bake for 12 to 15 minutes. Serve hot. ( I sometimes add a little chopped jalapeño to the mix) *** |

|
|
Ingredients:
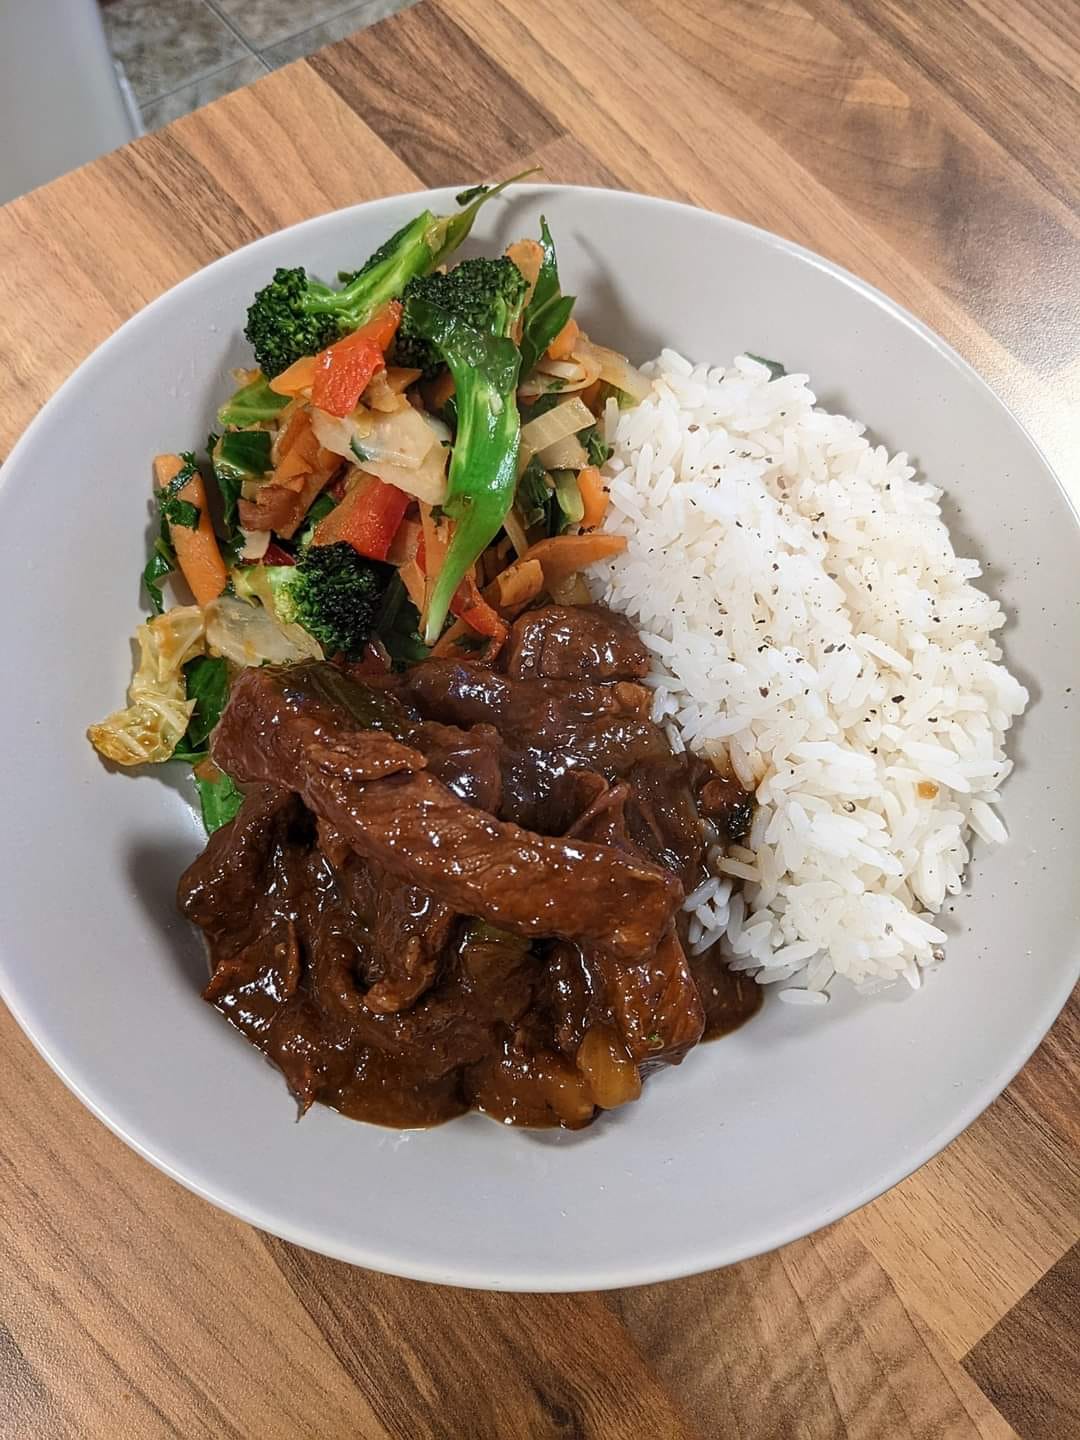
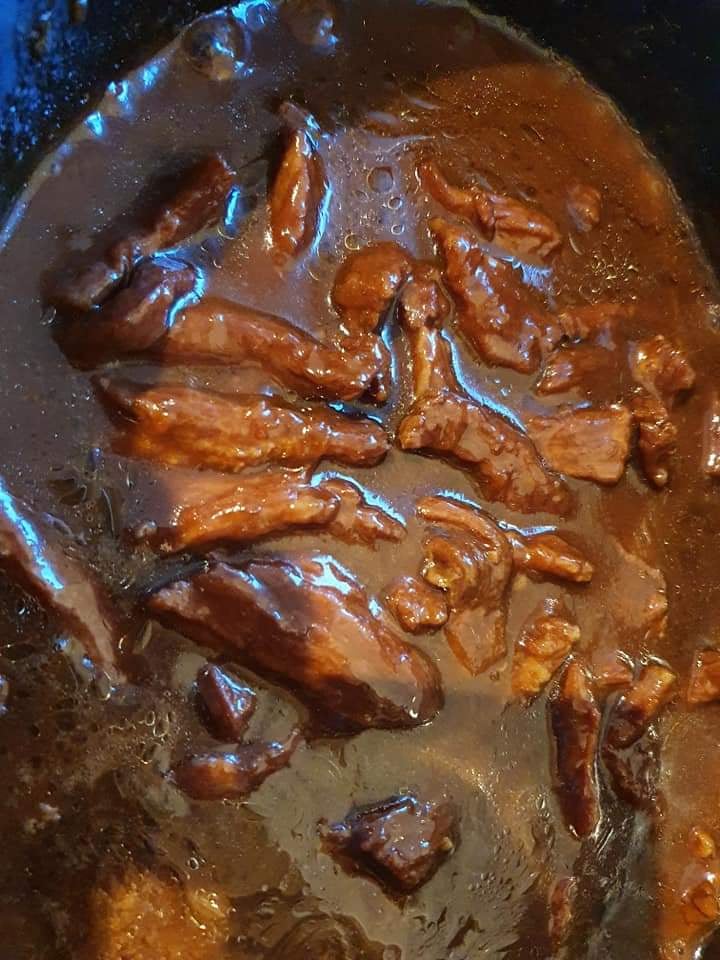
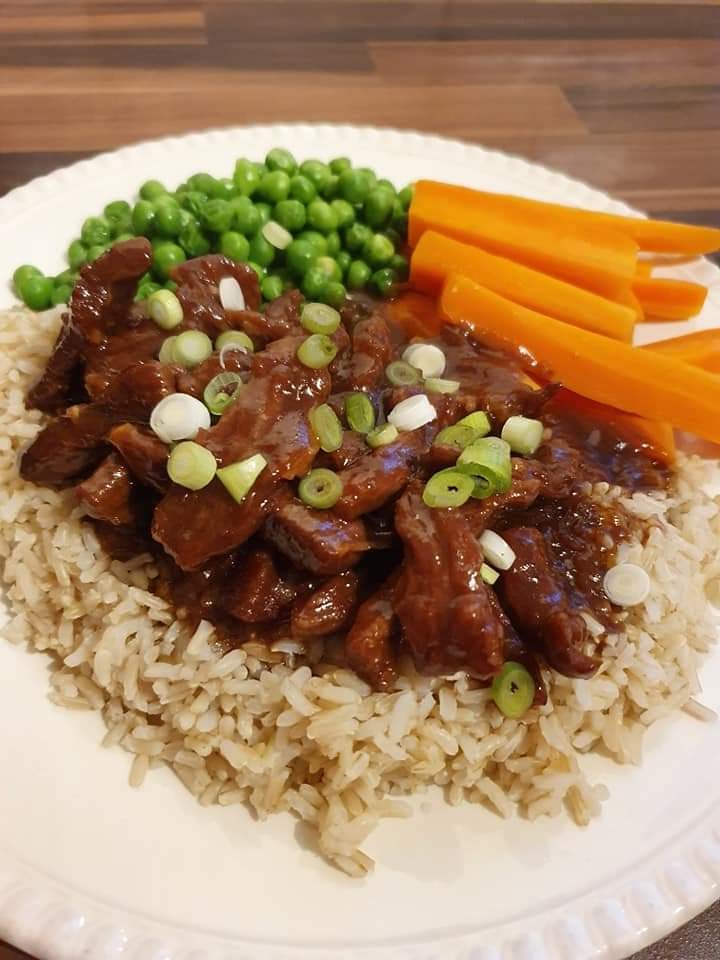
– 1.5lb flank steak (i cut a Brisket joint up) – 1/2 cup corn starch – 2tbsp Olive oil – 1/2 tsp crushed/diced garlic clove. Or how ever strong you like it! – 3/4 cup soy sauce – 3/4 cup water – 3/4 cup brown sugar – 1 cup finley grated carrots – spring onions (garnish) |
Directions::
1) Cut steak into thin 1″ stripes and mix in a bowl or bag with the flour
2) Add Olive oil, garlic, soy sauce, water, sugar and carrots to slow cooker. Stir it all up and add the now floured steak. Stir again.
3) Cook on high 2-3hrs or low 4-5hrs (i left mine in for 6hrs, longer the better with tough cuts of meat!).
Serve over rice with chopped spring onions.
Its a kinda sweet dish- think chinese type. But the sauce would go with what ever you prefer chips/bread/egg fried rice etc…..

|
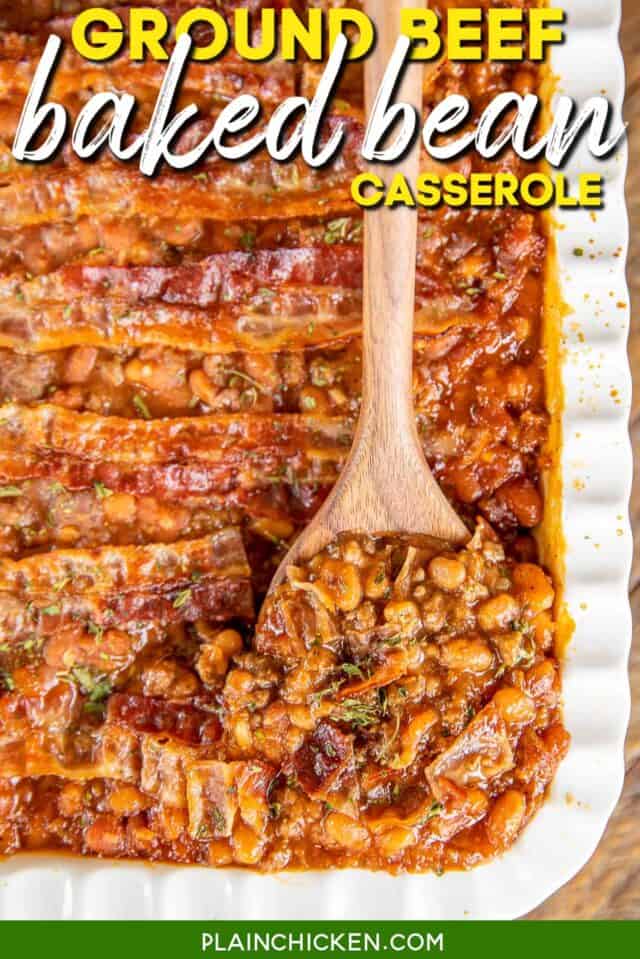
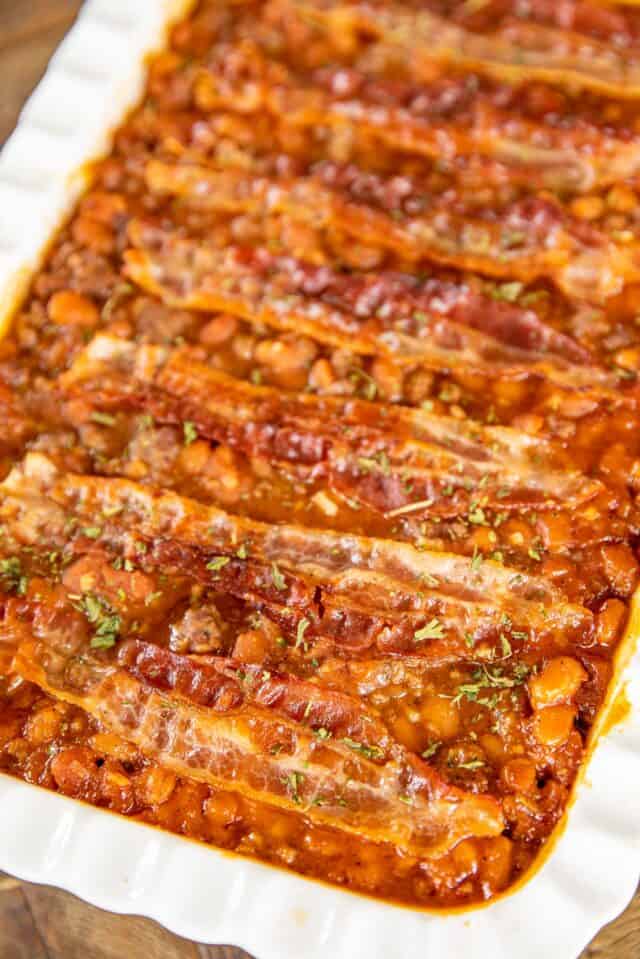
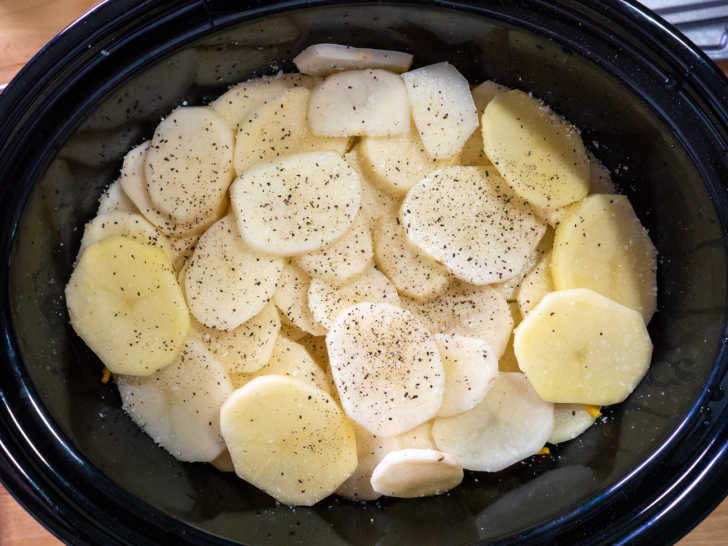
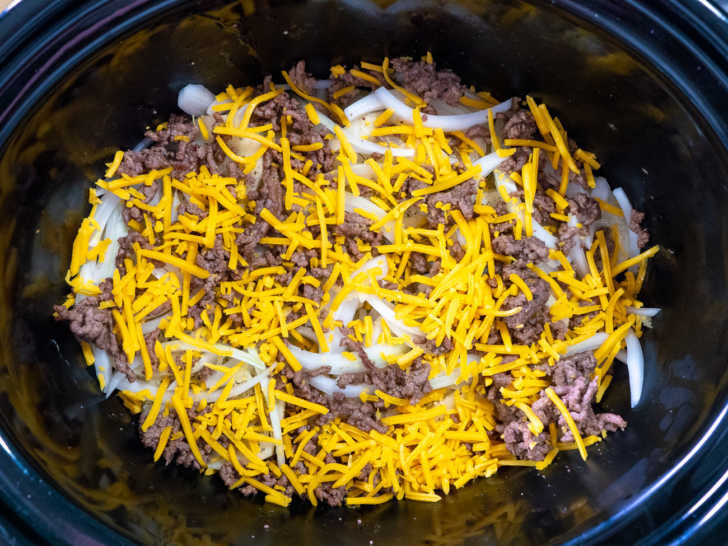
No BBQ dinner is complete without a good side of baked beans. This Ground Beef & Baked Bean casserole is one of our favorite side dishes. The beans have a wonderful flavor and are a breeze to make. They reminded us of the Tequila Beans at J. Alexander’s, our favorite. You might want to double the recipe if you are feeding a crowd. We almost ate the pan between the two of us!
|
How to Make Ground Beef & Baked Bean CasseroleThis casserole is super easy to make. Start with cooking some ground beef in a skillet until no longer pink. In a large bowl, combine the cooked beef with onion, canned Pork & Beans, ketchup, brown sugar, dijon mustard, salt, and black pepper.
Pour beef mixture into a casserole dish. Arrange bacon slices on top and bake.
|


|
Ingredients
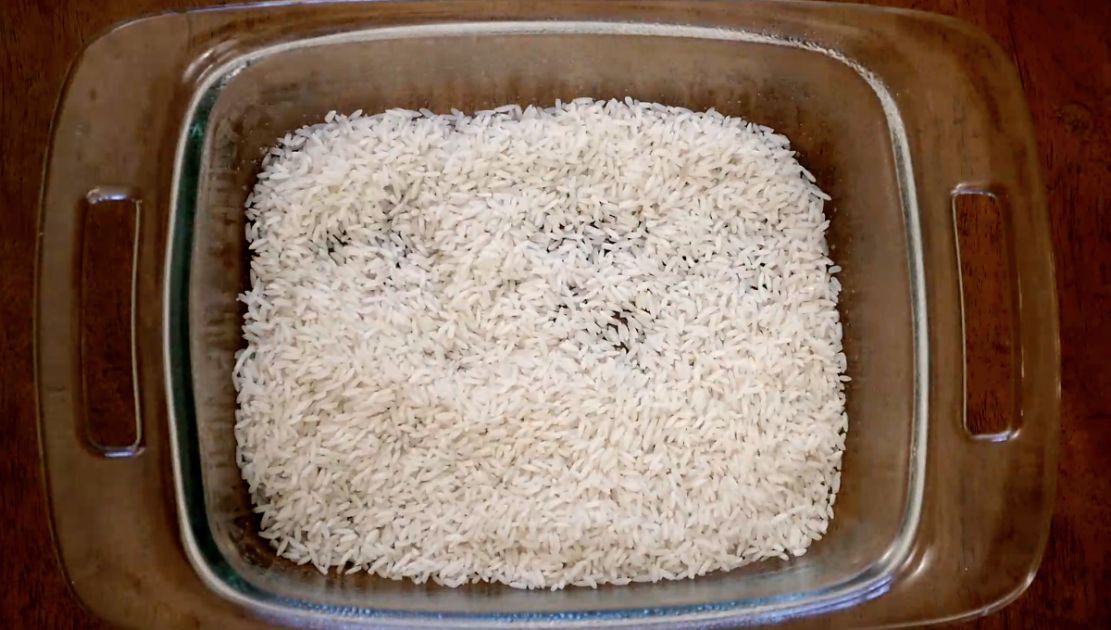
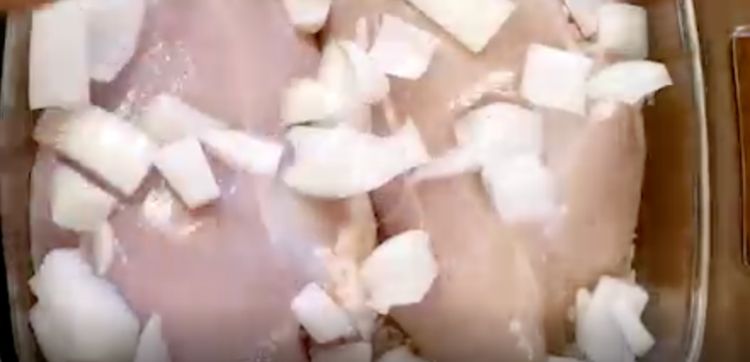
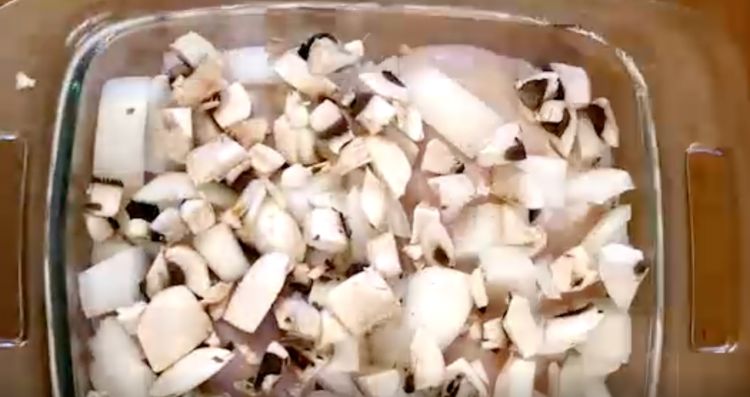
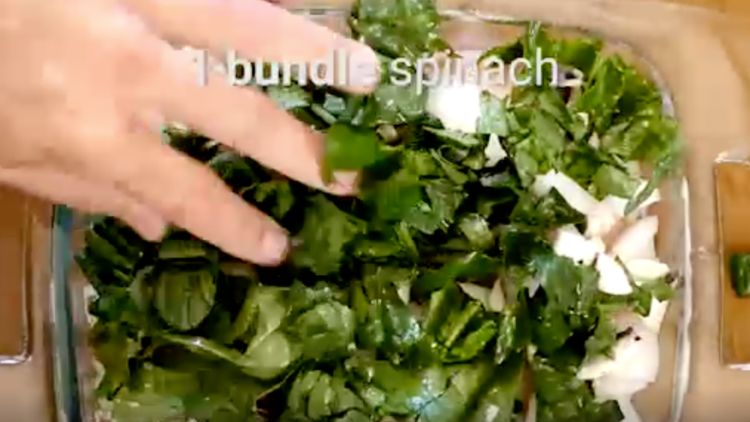
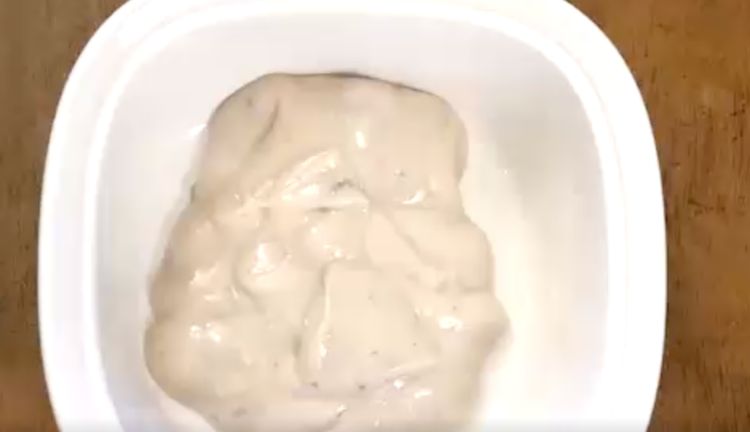
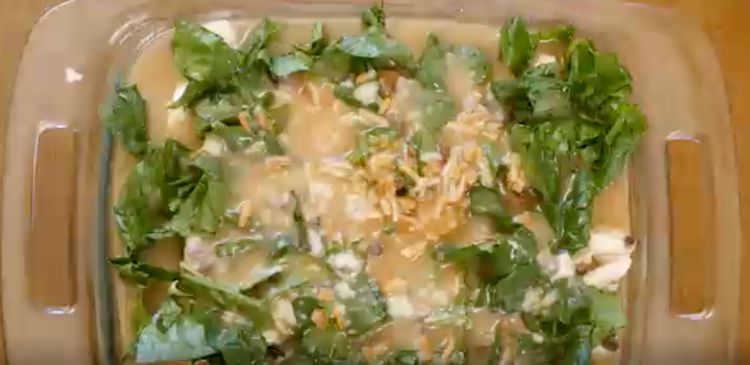
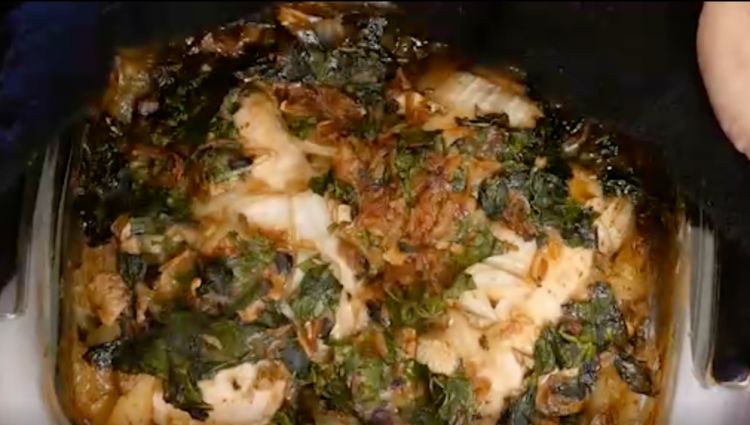
- 1 cup of raw rice (185 grams) - Arborio or Bomba rice are idoneous for baking, but they may be expensive where you live. Try regular white or brown rice instead - 3 boneless and skinless chicken breasts - 1 package of dry onion soup mix - If you cannot easily find it where you live, try preparing your own with this recipe. - 1 can of cream of mushroom soup - If you cannot find it where you live, it's basically an easy bechamel with mushrooms and evaporated milk. Try to make your own and freeze it so you can use it whenever you need! - 3/4 onion, roughly chopped - 2 cups of water - Salt and pepper to taste - 1 package of mushrooms, chopped (optional) - 1 bundle of spinach, chopped (optional) Directions
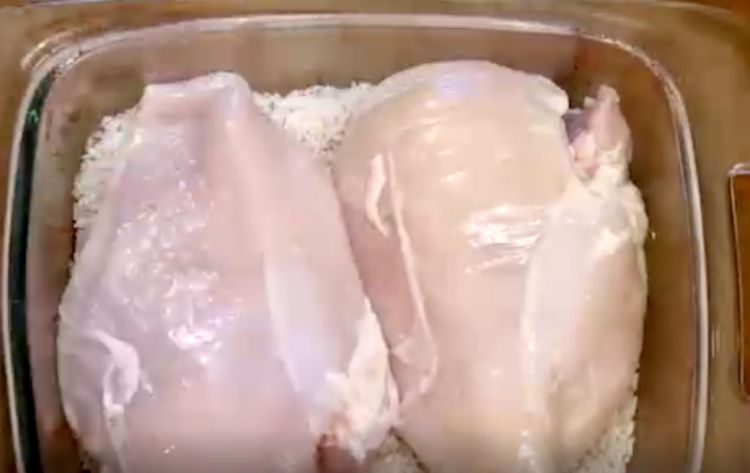
1. Preheat your oven to 320 F (160 C). Lightly grease a casserole and place your raw rice evenly on it. Slice the chicken and place it over the rice. 2. Add the chopped onion. If you're going to use the mushrooms and the spinach, now it's the time to add them too. It'll add some extra vitamins to the mixture! If you're not a fan of this combination, try other veggies instead. Just remember that when baking tomato or zucchini, you have to be careful because they add more liquids to the mix. We added some spinach at this step. 3. Mix the cream of mushroom soup, the dry soup mix and the 2 cups of water. Season to taste and pour the mixture over the rest of the ingredients. 4. Cook for 2 hours. Let it cool for 10-15 minutes before serving. Copyright 2016 Cooktop Cove |
By Carmen Martínez
Too often, recipes that claim to be "foolproof" end up being difficult to perfect, leaving you in a pile of wasted ingredients questioning your intelligence. With the chicken and rice casserole rice recipe below, you'll be hooked in one bite.
One of the most appealing aspects of this chicken casserole is how little preparation and cleanup is actually required. Since you're cooking the rice and chicken together in the same casserole dish, cooking them is as easy as pouring the ingredients in a single dish and popping them in the oven. As for cleanup, you just have that one dish to worry about. Check out the recipe below:

|
|
|

|
|

|
INGREDIENTS
PREPARATION
|


RECIPE: https://iamhomesteader.com/hasselback-potatoes/
Hasselback potatoes are so fun! Crispy, soft, flavorful, and a definite show stopper! A fun way to add something new to your holiday menu. |
Ingredients
Instructions
|
To make these potatoes, first, wash the potatoes well and then pat them dry. Next, cut slits into each potato, but don’t cut all the way through the bottom. Again, placing a potato in between two skewers or chopsticks will help prevent you from cutting all the way through the potato.
Once the potatoes have been sliced, place the potatoes on an unlined baking sheet. Use about half of the amount of melted butter to brush over the potatoes. Season with salt and pepper and bake for 30 minutes. After 30 minutes, carefully fan out the potatoes with a knife. Then, brush on the remaining butter and bake for an additional 30-35 minutes, or until the edges are crispy and the inside is tender. Serve warm with salt and pepper, to taste.
With the slits in the potatoes, these would also be perfect for adding your favorite toppings from cheese to chili to sour cream, or any of your favorite potato garnishes.
To make the potatoes in an air fryer, follow the instructions up to cooking time. After brushing on half the butter and seasoning with salt and pepper, cook the potatoes for 15 minutes at 360°F. Then, brush on the remaining butter and cook an additional 10 minutes, or until the edges are crispy and the insides of the potatoes are tender.

|
HOMEMADE SLOPPY JOES

|
INGREDIENTS:
1 Tbsp butter 1 tsp olive oil 1 lb. ground beef 1/3 green bell pepper, minced 1/2 large yellow onion, minced 3 cloves garlic, minced 1 Tbsp tomato paste 2/3 cup ketchup 1/3 cup water 1 Tbsp brown sugar 1 tsp yellow mustard 3/4 tsp chili powder 1/2 tsp Worcestershire sauce 1/2 tsp kosher salt 1/4 tsp red pepper flakes (optional) 1/4 tsp black pepper dash of hot sauce (optional) |
INSTRUCTIONS:
Heat butter and oil in large skillet over MED/MED-HIGH heat. Add beef and brown, breaking apart into crumbles as it cooks, about 5 minutes. Drain.
Add onion and bell pepper to same skillet and cook 2-3 minutes, until soft. Add garlic and cook 30 seconds or so, until fragrant. Add beef back to the skillet and add tomato paste. Stir well.
Add ketchup, water, brown sugar, mustard, chili powder, Worcestershire sauce, salt, red pepper flakes (if using), and black pepper. Stir well to combine.
Cook over MED heat for 10-15 minutes, until mixture has thickened to your liking. Remove from heat and serve over toasted buns


|
King Ranch Chicken
If you are looking for a family-friendly dish that will leave everyone at the table satisfied, try this King Ranch Chicken! It is a perfect weeknight meal or a meal that you can prepare ahead of time to enjoy on those busy nights. The sauce, tortillas, chicken, and cheese melt together beautifully and deliciously. Ingredients
|
Instructions
- Preheat the oven to 350°F and spray a 9×13-inch baking dish with nonstick cooking spray.
- To a large skillet over high heat, add butter. Once the butter has melted, add onions, red pepper, and green pepper. Cook until softened (about 5-8 minutes).
- Add soup, tomatoes, chicken stock, sour cream, chili powder, and cumin. Mix together until combined. Remove from heat.
- Add ¼ cup of the sauce to the bottom of the prepared baking dish, spreading it out in an even layer.
- Top the sauce with 12 quarter pieces of the tortillas, 1½ cups of chicken, 2 cups of the remaining sauce, and 1½ cups of cheese. Repeat with the remaining tortillas, chicken, sauce, and cheese.
- Bake, uncovered, for 40 minutes, or until the cheese is bubbling.
- Broil for 1-2 minutes. (To brown the cheese- this is optional.) Remove from the oven and let it rest for about 5 minutes. (It may seem runny at first, but it will set up.)
- Serve garnished with parsley.


|
INGREDIENTS
1 large white onion, halved and sliced as thin as possible 12 oz 80% lean ground beef 1 teaspoon vegetable oil 4 slices American cheese 4 brioche hamburger buns, buttered and lightly toasted FOR THE SPECIAL SAUCE: 1/2 cup mayo 3 tablespoon ketchup 2 tablespoons mustard Salt, to taste 1/4 cup dill pickles, diced 1 shallot, diced 1 tablespoon pickle juice Dash of hot sauce |
PREPARATION
Using a paper towel, brush vegetable oil onto a large cast iron skillet or griddle. Heat over high heat until smoking lightly.
Form beef into four 3 oz balls. Press balls of beef down into skillet or griddle with an offset spatula, using the flat-edge of a second spatula to press the first spatula down until you can flatten meat no more. Season beef liberally with salt and pepper. (If using a skillet, work in batches and cook only 2 patties at a time.)
Working quickly, arrange onions evenly over patties and press down with spatula to embed onions in meat. Let cook undisturbed until burgers are well-browned, about 2 minutes.
Carefully flip burgers over so onions are now on the bottom and let cook until onions start to soften, about 1 minute.
Top with cheese and top bun. Place bottom bun upside-down on the top bun so it can steam in the onion flavor.
Once buns have softened, transfer bottom buns to a plate. Lift onions, burger, and top bun together and transfer to bottom bun. Serve with special sauce and enjoy!
To make special sauce, stir together all sauce ingredients and chill 30 minutes.
Recipe adapted from Big Oven.

|
INGREDIENTS
PREPARATION
|


|
"I'm not polish, but I am German and this is right up my alley! Brought it to a covered dish dinner at church and folks all loved it! Great quick dish."
Get the recipe: https://bit.ly/3BL5NlP |


|
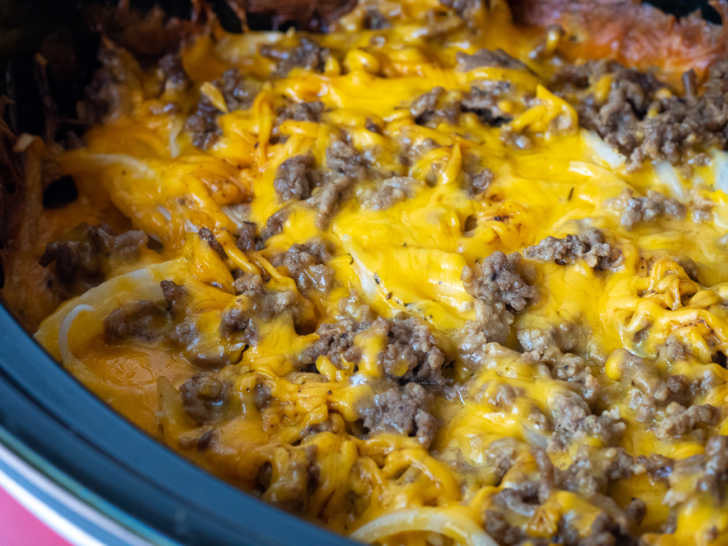
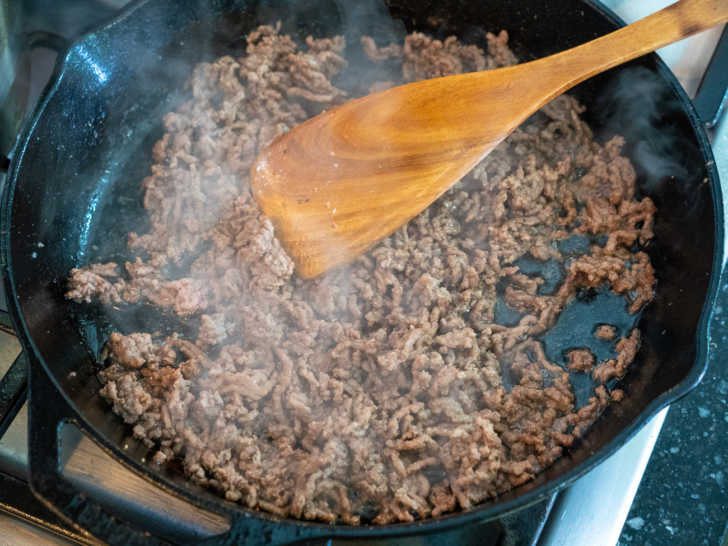
4-INGREDIENT HAMBURGER CASSEROLE
INGREDIENTS
PREPARATION
4-Ingredient Hamburger Casserole: Full Recipe |


BAKED SHOTGUN SHELLS
-1LB Pork Sausage
-1 and 1/2 cup of shredded cheddar cheese
-1 pack of manicotti shells
-1LB of thin/normal cut bacon
-BBQ seasoning of your choice
-BBQ sauce of your choice
| Instructions |
Prep:
1. Remove the pork sausage from the packaging and add it to a large bowl.
2. Season the pork sausage to taste with BBQ seasoning of your choice. ( used a garlic seasoning mix)
3. Mix in 1 and 1/2 cups of shredded cheddar cheese until well incorporated.
4. Remove a manicotti shell from the package and carefully start stuffing it with the sausage and cheese mixture until it is completely stuffed with the pork and cheese mixture. Repeat the process until your sausage mixture is gone.
5. After the shells are stuffed, carefully wrap them in bacon and do your best to completely cover the entire shell so there no dry and crunchy spots after the cook.
6. Once all the shells are wrapped in bacon, season liberally with the BBQ seasoning of your choice.
| Cooking |
1. Preheat the oven to 325º F.
2. Bake for about 1 hour or until the bacon is done and the sausage mixture is at a food safe temperature (165º F).
3. Once the shotgun shells are done, brush a light layer of BBQ sauce on each shotgun shell.
5. Allow the BBQ sauce to set on the shells for approximately 3-5 minutes in the oven.
6. Once the glaze has set remove to cool for approximately 5 minutes.
I will say if you don't cover the ends you will get some crunchy bits but its really not enough to distract from the food

|
Balsamic Onion Pot Roast

|
Serves 6
15m prep time 6h cook time INGREDIENTS 1 3 to 4lb chuck roast 2 tablespoons olive oil 2 large onions, sliced thick 3 large carrots, chopped into 2-inch pieces 4 red potatoes, halved 4 cloves garlic, peeled 1 cup beef stock 1/2 cup balsamic vinegar 1/2 cup tomato sauce Kosher salt and freshly ground black pepper, to taste |
PREPARATION
- Season roast liberally with salt and pepper.
- Add oil to a large skillet over medium-high heat. Once hot, brown roast on all sides.
- Transfer roast to a slow cooker and top with potatoes, carrots, onions, and garlic. Pour beef stock, balsamic vinegar, and tomato sauce over the top.
- Cover and cook on low 6-8 hours.
- Once roast is fork tender, remove from slow cooker along with vegetables and tent with foil to keep warm.
- Strain liquid from slow cooker and simmer in a saucepan on the stove until liquid reduces by about a third. Serve over meat and vegetables. Enjoy!

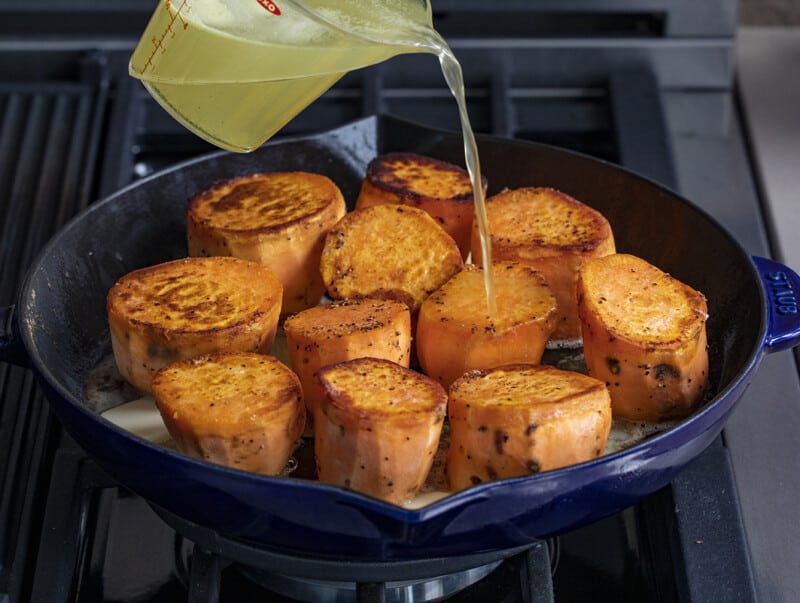
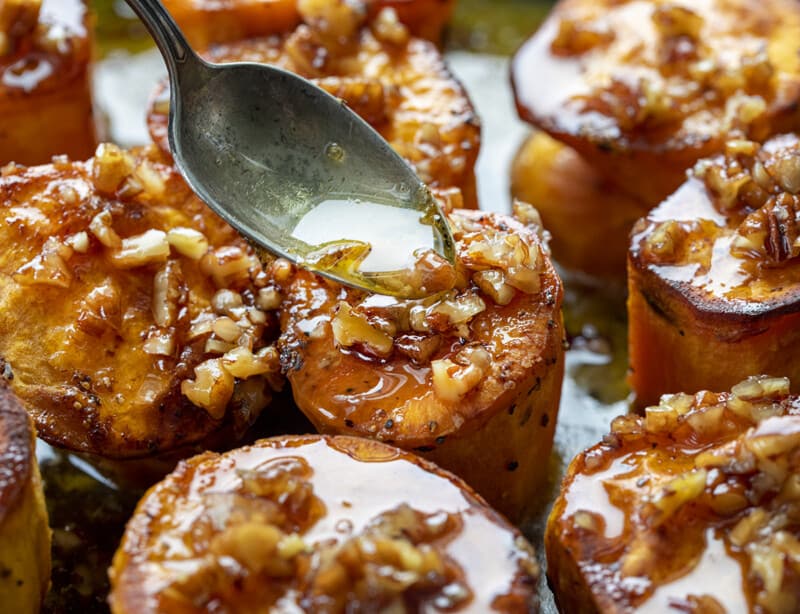
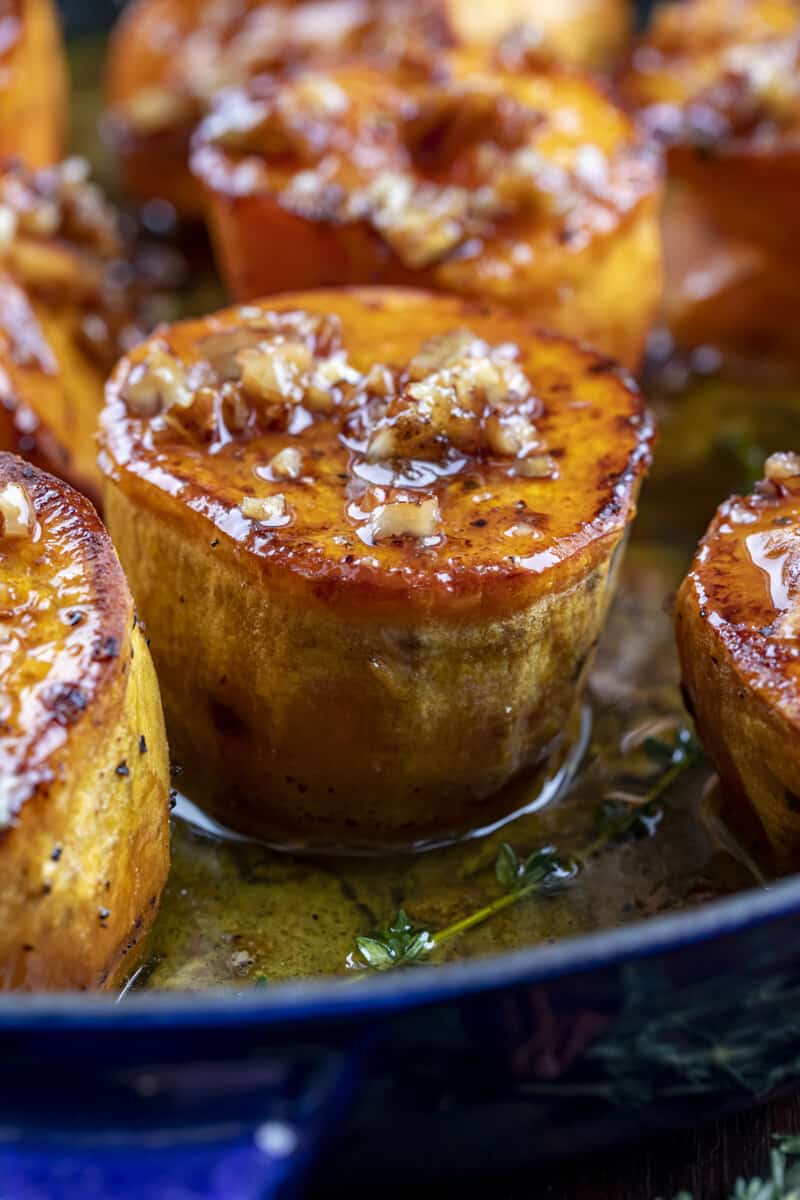
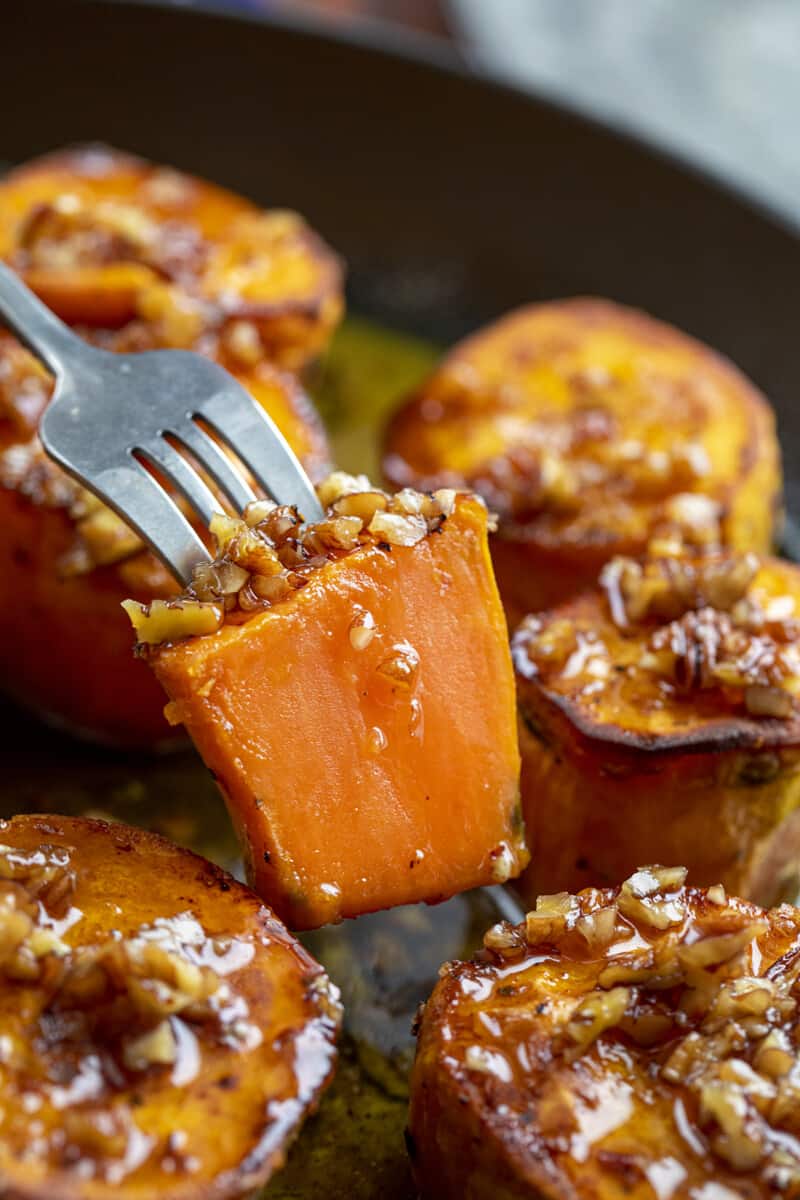
Fondant Sweet Potatoes with Bourbon Pecan Glaze
|
|
Fondant Sweet Potatoes with Bourbon Pecan Glaze are seasoned sweet potatoes, browned, then baked in the oven, and served with a sweet and nutty glaze. If you prefer russet potatoes, check out her Fondant Potatoes recipe.
|

|
|
|
|

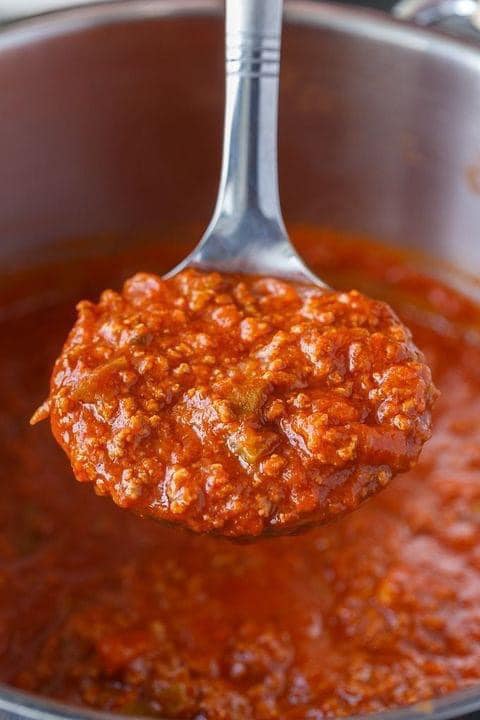
HOMEMADE SPAGHETTI SAUCE
|
HOMEMADE SPAGHETTI SAUCE
1/4 cup extra virgin olive oil 1 1/2 lb lean ground beef 1 medium onion, chopped 2 cloves garlic, minced 1 green pepper, chopped 1 cup mushrooms, sliced 1 bay leaf 1/4 tsp oregano 1 tsp Italian seasoning 1 tbsp tomato paste 1 (28oz) can crushed tomatoes 1 (12oz) can tomato sauce 1/2 tsp salt 1/4 tsp pepper 1 tbsp sugar 1 tbsp fresh parsley, chopped, for garnish, optional CLICK HERE FOR COMPLETE RECIPE . . .
|


|
Serves 6
15m prep time 30m cook time Allergens: Milk, Gluten INGREDIENTS
PREPARATION
Recipe adapted from Smart Schoolhouse. |


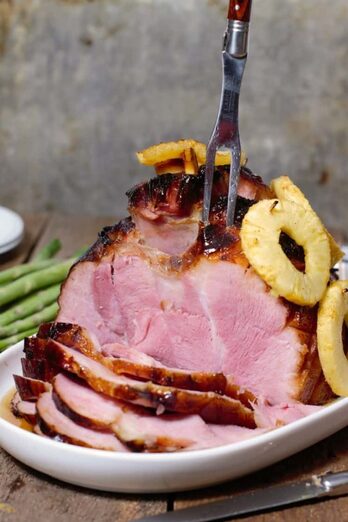
PINEAPPLE & HONEY GLAZED HAM (BONE-IN)
Published on April 17, 2019 ᛫ Updated on May 9, 2019 by Chef Markus Mueller A staple for many holiday dinners, this old fashioned bone in pineapple and honey glazed ham is a truly wonderful thing when properly prepared.
Jump to Recipe
This easy bone-in ham is perfect for serving at Easter, Thanksgiving or even Christmas. If you're into meal prepping, you can even cook this ham on the weekend and use any leftover meat for sandwiches, breakfast egg muffins, and more throughout the week.
This post contains affiliate links for which we may be compensated if a purchase is made through the links provided. For more information please read our affiliate disclosure.
DIFFERENT TYPES OF HAM
Ham is by definition, the cured hind leg of the pig. Ham may be dry cured, or wet cured (brined), as well as smoked.
Depending on the specific cut of the leg and the curing process, various different types of hams may be created, such as Parma ham, and Serrano ham.
When choosing a ham for your holiday dinner, you usually have a few options, and it can be confusing if you're not sure what to look for.
BONE- IN HAM VS BONELESS HAM
A 'whole ham' usually refers to the entire cured rear leg of pork and includes the thigh bone, part of the pelvic bone, and occasionally part of the tailbone.
A whole ham is usually large enough to feed anywhere from 12 to 20 people, but due to its size, it also takes quite a while to cook.
Alternatively, you can opt for a 'half ham', and these are usually the size you'll find at grocery stores. When choosing a half ham you can choose between the 'Butt' or 'Shank' cut. Both are bone-in.
Boneless hams are also an option and also come brined or smoked. Just as advertised, they have had the leg bone removed, and were traditionally tied back up with butchers twine to making roasting easier.
Nowadays you'll find boneless ham usually sealed in plastic in an oval shape. The upside to boneless hams Is that they are easier to carve, but they are not as flavorful or juicy as a bone in ham.
Bone-in Hams are juicier and more flavorful, and you get a wonderful ham bone with which to make soup or broth with after!
PRE-COOKED VS UNCOOKED HAMIn North America, you will often find pre-cooked hams which will be labelled 'ready to eat'. Finding un-cooked ham is very difficult in grocery stores, though you can pre-order un-cooked, cured hams from your local butcher.
Pre-cooked hams still need to be 'cooked' or roasted, but only to bring them up to temperature, and crisp up the fat. As such they are roasted at lower oven temperatures (300F - 325F) for 12- 15 minutes per pound.
HOW DO YOU COOK A BONE IN HAM?As a rule of thumb, bone-in hams are cooked for about 15 minutes per pound. This usually results in a cooking time of about one to two hours depending on the size of the ham. A little longer if glazing the ham.
Once you've purchased a ham and are ready to cook it, its important to make sure the rind, or skin, has been removed. Some hams will be marked 'skinless', make sure to check what yours says!
While you could leave the rind on, it is not very palatable and has a tough rubbery texture when cooked. It does not crisp up well.
If you purchased a ham with the rind on, you can watch this video to see how to remove it!
Once the skin has been removed, proceed with the recipe below.
PINEAPPLE & HONEY GLAZED HAM RECIPENote: this recipe for honey glazed bone-in ham uses pre-cooked ham (the butt). I used a smoked, skin-less ham butt which was pre-cooked
INGREDIENTSTo make this glazed ham you'll need:
Score the fat with a sharp paring knife. Try to avoid cutting into the ham itself.
2.Place the ham with the cut side down in a roasting pan and add ¼ cup of water to the pan. Cover the ham with tinfoil or a roasting pan lid. This will help keep moisture in the ham as it comes up to temperature.
Cook the ham for 1 hour, or until the ham reaches an internal temperature of 120F. Use a meat thermometer to check this.
3. As the ham cooks prepare the glaze by combining all the glaze ingredients in a pot and gently bringing them to a simmer. Cook the glaze until it starts to thicken slightly.
4. After the first hour is up, remove the lid from the ham and remove any liquid that may be in the pan. Set the juice aside, and turn the oven up to 350F. Take ⅓ of the glaze you made, and pour it over the ham, making sure to fully coat the ham. Roast the ham for 15 minutes
5. Take the pineapple slices and pin them to the ham, making sure to evenly cover the ham. Using a ladle or large spoon baste the ham and pineapple slices with any glaze in the bottom of the roasting pan. Baste the ham every ten minutes for the next half hour.
6. Take the temperature of the ham to see how far done it is. It should be at least around 150F- 155F by this point.
7. Turn up the temperature to 375F, and bake the honey and pineapple glazed ham, for another 15 minutes to lightly broil the pineapple.
8. Remove the ham from the oven, and let it rest for 10 minutes. As the ham rests, pour any remaining glaze( both in the pan and on the stove ) into the juice you set aside earlier. Thicken the sauce with cornstarch or a roux.
Serve the honey and pineapple glazed ham with the cooked pineapple slices as garnish. You may need to remove them from the ham to slice it!
Published on April 17, 2019 ᛫ Updated on May 9, 2019 by Chef Markus Mueller A staple for many holiday dinners, this old fashioned bone in pineapple and honey glazed ham is a truly wonderful thing when properly prepared.
Jump to Recipe
This easy bone-in ham is perfect for serving at Easter, Thanksgiving or even Christmas. If you're into meal prepping, you can even cook this ham on the weekend and use any leftover meat for sandwiches, breakfast egg muffins, and more throughout the week.
This post contains affiliate links for which we may be compensated if a purchase is made through the links provided. For more information please read our affiliate disclosure.
DIFFERENT TYPES OF HAM
Ham is by definition, the cured hind leg of the pig. Ham may be dry cured, or wet cured (brined), as well as smoked.
Depending on the specific cut of the leg and the curing process, various different types of hams may be created, such as Parma ham, and Serrano ham.
When choosing a ham for your holiday dinner, you usually have a few options, and it can be confusing if you're not sure what to look for.
BONE- IN HAM VS BONELESS HAM
A 'whole ham' usually refers to the entire cured rear leg of pork and includes the thigh bone, part of the pelvic bone, and occasionally part of the tailbone.
A whole ham is usually large enough to feed anywhere from 12 to 20 people, but due to its size, it also takes quite a while to cook.
Alternatively, you can opt for a 'half ham', and these are usually the size you'll find at grocery stores. When choosing a half ham you can choose between the 'Butt' or 'Shank' cut. Both are bone-in.
- The butt is cut from the upper part of the leg and is usually leaner and more tender.
- The shank is cut from the lower part of the leg and is slightly tougher then the butt. The shank makes up for this though by being fattier and more flavorful.
Boneless hams are also an option and also come brined or smoked. Just as advertised, they have had the leg bone removed, and were traditionally tied back up with butchers twine to making roasting easier.
Nowadays you'll find boneless ham usually sealed in plastic in an oval shape. The upside to boneless hams Is that they are easier to carve, but they are not as flavorful or juicy as a bone in ham.
Bone-in Hams are juicier and more flavorful, and you get a wonderful ham bone with which to make soup or broth with after!
PRE-COOKED VS UNCOOKED HAMIn North America, you will often find pre-cooked hams which will be labelled 'ready to eat'. Finding un-cooked ham is very difficult in grocery stores, though you can pre-order un-cooked, cured hams from your local butcher.
Pre-cooked hams still need to be 'cooked' or roasted, but only to bring them up to temperature, and crisp up the fat. As such they are roasted at lower oven temperatures (300F - 325F) for 12- 15 minutes per pound.
HOW DO YOU COOK A BONE IN HAM?As a rule of thumb, bone-in hams are cooked for about 15 minutes per pound. This usually results in a cooking time of about one to two hours depending on the size of the ham. A little longer if glazing the ham.
Once you've purchased a ham and are ready to cook it, its important to make sure the rind, or skin, has been removed. Some hams will be marked 'skinless', make sure to check what yours says!
While you could leave the rind on, it is not very palatable and has a tough rubbery texture when cooked. It does not crisp up well.
If you purchased a ham with the rind on, you can watch this video to see how to remove it!
Once the skin has been removed, proceed with the recipe below.
PINEAPPLE & HONEY GLAZED HAM RECIPENote: this recipe for honey glazed bone-in ham uses pre-cooked ham (the butt). I used a smoked, skin-less ham butt which was pre-cooked
INGREDIENTSTo make this glazed ham you'll need:
- 1 8-10 lb pre-cooked bone-in ham - pull the ham 1 - 2 hours before starting to let it come to room temperature.
- ¼ cup water
- 1 ripe pineapple
- 1.5 cup brown sugar
- 1 cup honey
- 1 cup unsweetened pineapple juice
- 1 teaspoon ground cloves
- ½ teaspoon ground cinnamon
- 2 whole oranges -juiced
- 1 lemon - juiced
Score the fat with a sharp paring knife. Try to avoid cutting into the ham itself.
2.Place the ham with the cut side down in a roasting pan and add ¼ cup of water to the pan. Cover the ham with tinfoil or a roasting pan lid. This will help keep moisture in the ham as it comes up to temperature.
Cook the ham for 1 hour, or until the ham reaches an internal temperature of 120F. Use a meat thermometer to check this.
3. As the ham cooks prepare the glaze by combining all the glaze ingredients in a pot and gently bringing them to a simmer. Cook the glaze until it starts to thicken slightly.
4. After the first hour is up, remove the lid from the ham and remove any liquid that may be in the pan. Set the juice aside, and turn the oven up to 350F. Take ⅓ of the glaze you made, and pour it over the ham, making sure to fully coat the ham. Roast the ham for 15 minutes
5. Take the pineapple slices and pin them to the ham, making sure to evenly cover the ham. Using a ladle or large spoon baste the ham and pineapple slices with any glaze in the bottom of the roasting pan. Baste the ham every ten minutes for the next half hour.
6. Take the temperature of the ham to see how far done it is. It should be at least around 150F- 155F by this point.
7. Turn up the temperature to 375F, and bake the honey and pineapple glazed ham, for another 15 minutes to lightly broil the pineapple.
8. Remove the ham from the oven, and let it rest for 10 minutes. As the ham rests, pour any remaining glaze( both in the pan and on the stove ) into the juice you set aside earlier. Thicken the sauce with cornstarch or a roux.
Serve the honey and pineapple glazed ham with the cooked pineapple slices as garnish. You may need to remove them from the ham to slice it!


DINNER
|
From Movies to Television... From Classic Re-runs to New Top Favorites...HOME
|
